
Creative Christmas Photo Cube
Photo Cube for Your Loved one

You'll need:
.square plastic bulb
.4 photos
.scissors
.chopsticks (or similar tool for unrolling and pushing photos into place)
.tweezers (just in case)
.glitter and glue (optional)
 STEP-1. Start by tracing the shape of your ornament on a piece of paper. Cut
out square to use as a template, and measure the size of the square to
figure out how big you'll need to print your photos.
STEP-1. Start by tracing the shape of your ornament on a piece of paper. Cut
out square to use as a template, and measure the size of the square to
figure out how big you'll need to print your photos.
 STEP-3. Once your photos are cut, carefully wrap them around a pencil and push them (one at a time) into the cube.
  STEP-4. Use a chopstick to unroll the pictures and gently push them to the
sides. I liked the look of the photos when they slightly bowed inwards,
so I didn't push them too hard against the glass, just gently nudged
them in place. Once all four photos are in they should hold each other
up. (Oh and if your photos don't fit, or you change your mind about one,
now is the time to get out the tweezers to pull them out. It's not
easy, so do your best to measure and cut your photos the right size from
the start!)
STEP-4. Use a chopstick to unroll the pictures and gently push them to the
sides. I liked the look of the photos when they slightly bowed inwards,
so I didn't push them too hard against the glass, just gently nudged
them in place. Once all four photos are in they should hold each other
up. (Oh and if your photos don't fit, or you change your mind about one,
now is the time to get out the tweezers to pull them out. It's not
easy, so do your best to measure and cut your photos the right size from
the start!)
These next steps are optional...
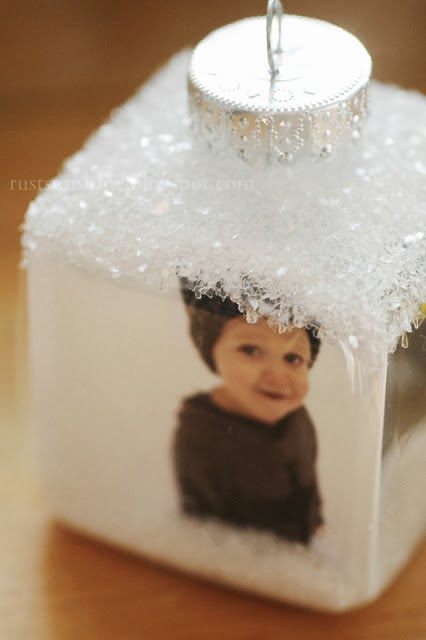 STEP-5. To hide the clear bottom of the bulb and the edges of the photos, I poured a small amount of glitter inside (you could also do this before
inserting the photos), and kept tilting my bulb upside down until each
photo had a small "snowdrift" in front of it. If the glitter sticks to
the sides of the glass, try tapping on the bulb to remove it.
STEP-5. To hide the clear bottom of the bulb and the edges of the photos, I poured a small amount of glitter inside (you could also do this before
inserting the photos), and kept tilting my bulb upside down until each
photo had a small "snowdrift" in front of it. If the glitter sticks to
the sides of the glass, try tapping on the bulb to remove it. STEP-6. Then I added a layer of "snow" on top with a thick coat of Mod Podge,
and finished it off by writing the year on the bottom with a permanent
marker.
STEP-6. Then I added a layer of "snow" on top with a thick coat of Mod Podge,
and finished it off by writing the year on the bottom with a permanent
marker.
I love how it turned out! Might have to make more for Abe's
grandparents. If I find some extra time, I might jot down some of his
milestones and funny quotes from this year and tuck them inside. Maybe
I'll also add some memories (our trip to Iowa, my sister's wedding, expecting baby ) to add to our family photo bulb.


0 comments: